Your First Portfolio Shoot Prep Guide.
Wardrobe, Grooming, Mindset & What to Bring.


A portfolio shoot goes best when the prep is simple, intentional, and focused on one outcome: clean, current, bookable images that look like you on your best day.
This guide walks through what to do in the days leading up to your session – wardrobe, grooming, hair and makeup, what to bring, and how to show up calm and confident – so we spend our time creating range, not fixing avoidable issues.
The goal
Prep has one job: help you look like yourself, just more polished. Not overly styled. Not filtered. Not “a different person.” When you prepare well, you settle in faster, your wardrobe reads cleaner, and your expressions look more relaxed and natural.
48-72 hours before the shoot
This is the sweet spot for prep because it gives you time to make small adjustments without last-minute stress.
Two things matter most: sleep and hydration. Puffy eyes, dry skin, and low energy show up on camera quickly. A couple solid nights of sleep does more for your face than any new product.
Keep your routine predictable. Avoid trying anything for the first time the week of your shoot – new skincare, self-tanner, whitening strips, a dramatic hairstyle change, or aggressive treatments. If your skin gets irritated, it’s harder to calm down in time.
If you’re planning a haircut, trim, or color, schedule it early enough that it feels settled and familiar by shoot day. The goal is “this looks like me,” not “this is a surprise.”
Wardrobe
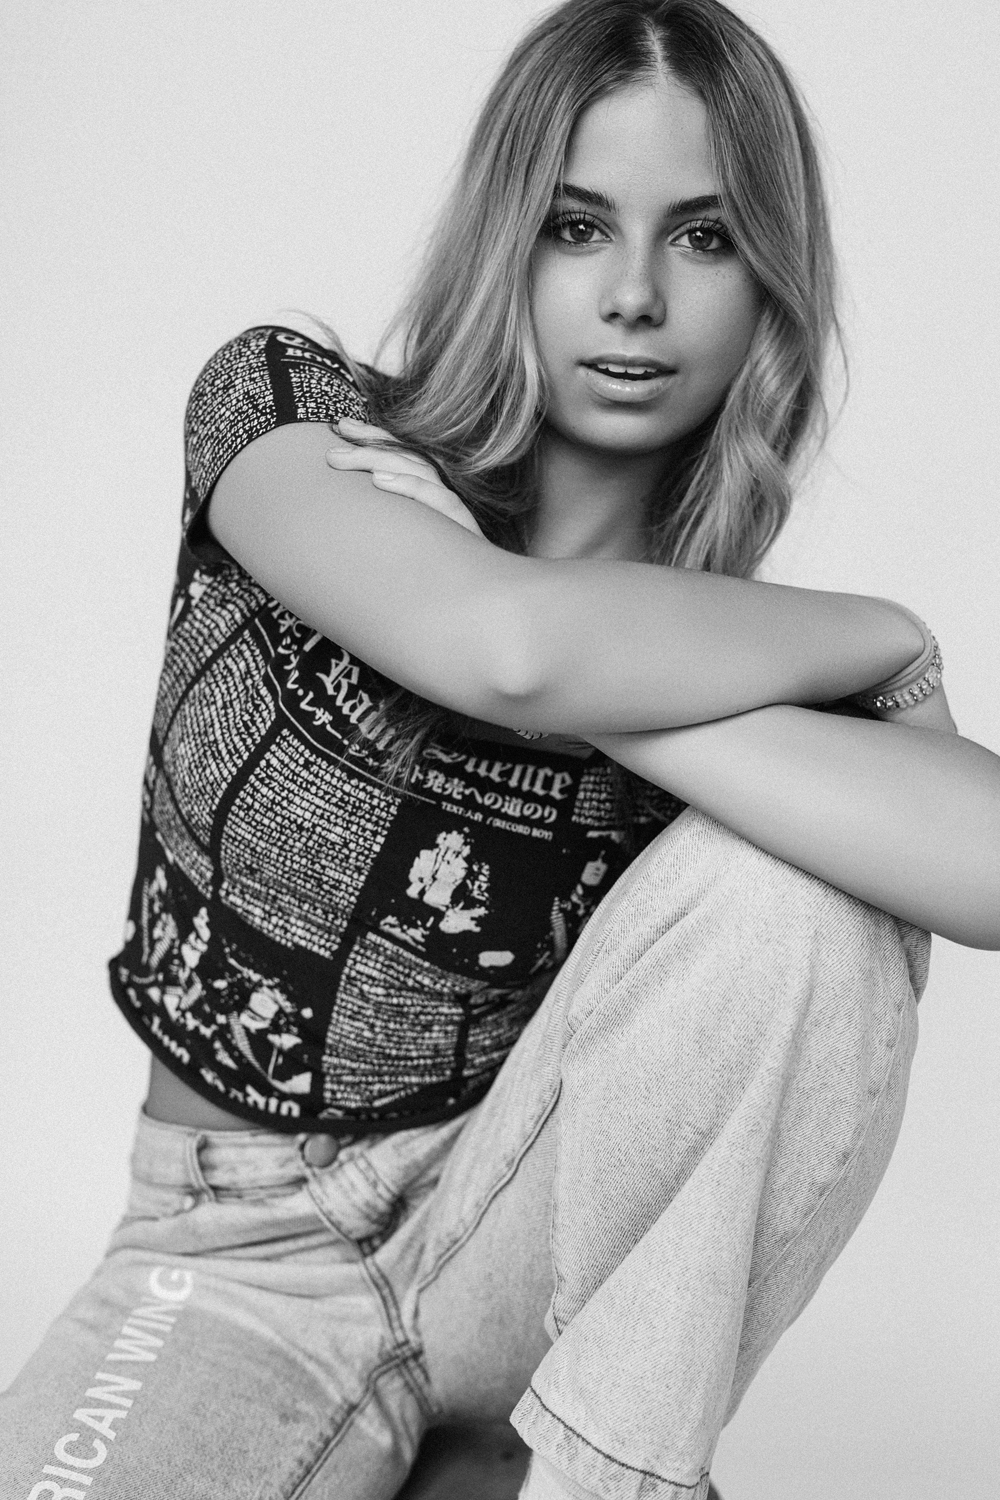
Wardrobe is where most people overthink, so here’s a simple rule: clean, fitted, modern usually wins.
Your clothes should support your frame and keep attention on your face. Pieces that pull, gap, wrinkle easily, or require constant adjusting will slow the session down and distract in photos.
The easiest way to build variety without becoming “costume” is to choose looks that feel different in energy while still feeling like you. A clean baseline look, a slightly more elevated look, and a relaxed lifestyle look create range without confusion. (If your session includes multiple outfits, we’ll plan them strategically so your gallery doesn’t feel repetitive.)
If wardrobe recommendations would help, message me in your project portal and upload a couple recent snapshots -ideally including a full-length photo so I can give guidance that fits your frame and your goals.
Grooming basics
You don’t need perfection. You need polish.
Small details matter because they keep the final images looking professional without looking overdone. Clean, natural nails are worth doing. Moisturized lips help (especially in winter). Light exfoliation a day or two before can be helpful -just avoid doing anything harsh the morning of.
Breakouts happen. The best approach is to keep your skin calm and avoid picking. Blemishes can be retouched; irritation from over-treating is harder to correct.
Hair and makeup
Hair and makeup should look camera-ready not “glam.” The goal is that an agency or casting director recognizes you instantly and trusts what they’re seeing.
Doing your own makeup can absolutely work when you if you’re proficient with the tools, and already have a natural routine that photographs well. Professional hair/makeup is recommended though when you want a polished finish, less stress, and consistency – especially if you’re building a stronger, more competitive set. To add, most agencies prefer professional hair/makeup as the results tend to be more suited for industry needs.
If you choose professional hair/makeup, I can share your reference snapshots with the artist so they arrive prepared and keep your look aligned with your goals.
What to bring
You don’t need a suitcase. A few smart essentials prevent small issues from becoming session-stoppers.
Bring your outfits on hangers if possible. Include a lint roller, a small mirror, a brush/comb, basic touch-up items (even if you’re going natural), and water. If you’re wearing multiple looks, bring the undergarments that support each outfit so everything fits smoothly and you feel confident.
Day-of mindset
This is important: you don’t need to know how to pose. Direction is part of what you’re paying for.
Most people warm up after the first few minutes. That’s normal. The first part of a shoot is often about settling in, finding your best angles, and building momentum. If you feel nervous, say so – there’s zero judgment. It just helps me pace the session so you feel comfortable faster.
Logistics and arrival
Give yourself enough time to arrive without rushing. Rushing shows up on camera as tension in the face, shoulders, and posture.
Once you book your session with me, your studio address, parking details, and shoot communication should live inside your online project portal so you’re never hunting through emails. If anything looks unclear, message me in the portal ahead of time and we’ll get it sorted.
What happens after the shoot
After the session, you’ll receive a sample retouched image so you can see the direction of the final look and feel excited about what we created. Then your proofing gallery will be delivered inside the portal, where you’ll choose favorites for final retouching.
That workflow is intentional: it keeps everything organized, reduces confusion, and makes the process feel clear from start to finish.
Ready to book?
The next step is simple: book your session, and I’ll set up your project portal for scheduling, planning, and shoot details. From there, we’ll build a portfolio that feels current, competitive, and aligned with your goals.
Your Next Must-Read:
Your First Portfolio Shoot – the Complete Prep Checklist
